Friday 30 November 2012

Inspiration 2

Went to the Festival of Crafts tonight in search of inspiration, and definitely found it in the artwork of Olga Cuttell.  I couldn't decide on a print, or maybe a pendent, so I got her 2013 calendar, where I can admire not one, but twelve of her beautifully whimsical pieces.


The cover print is one of my favourites!  Sorry, the photo is a bit yellow.  The lighting at this time of night is not the best for photography, but I wanted to share right away.  You will get a much better look at this print, and others, on her website.  Checking out the work of other artists is great for getting the creative juices flowing, and gets you seeing things from a different perspective.


Friday 23 November 2012

CIRRUS


This versatile, button closure cowl is the product of some serious brainstorming for a class idea.  I was posed with teaching a condensed version of Knitting for Beginners.  The class usually runs four weeks, put I was asked to teach a three week version.  The usual projects wouldn't do for this time frame, but I still wanted the students to get their basics, all in one project.  This would be tricky!

Driving home one night, the clouds in the sky were set in ever narrowing waving lines.  It suddenly struck me that the answer to this dilemna I had been given might be found in the Feather and Fan Stitch.  The pattern stitches used in this project are modifications of the ever popular Feather and Fan Stitch, which incorporate knits, purls, increase, and decrease to create a feminine, textured cowl.  So, as intricate as this cowl may look, if you have your basics, it is totally doable.

  As the fabric is reversible, it can be worn just as a round cowl, or twisted as a mobius. Another part of the versatility comes from the multiple buttons, which don’t have to be buttoned in order or buttoned all the way.


I-chords create the button loops.


And, the buttons nestle in the soft curves of the cast-off edge.


If you would like to substitute with a yarn other than Berroco’s Voyage, be sure to choose a chainette yarn, as they have very unique properties that have been taken into consideration in this design (this is the reason for the seemingly small gauge for such large needles).  However, if you can get your hands on the original yarn used in this design, you won't be disappointed.  It is so lofting, soft, and warm, it feels like a cloud around your neck!


Interested in knitting this project?  Here is some helpful information.


SIZE:  Ladies: close fitting [52cm (20½") circumference], and draped fit [70cm (27½") circumference]

GAUGE:  16 sts/24 rows = 10cm (4") in Garter Wave Stitch on 9mm (13US) needles

MATERIALS:  

  • 2 skeins of Voyage by Berroco for both the close fitting and draped fit cowls
  • 1 pair 9mm (13US) needles
  • 1 set 9mm (13US) dpn
  • 4 medium buttons

Play around with the multiple ways to wear this cowl, and make it your own!


Sunday 18 November 2012

Cowachin Sweater Hem: Part 2

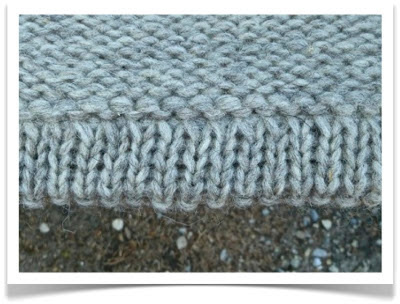
Last week I showed you some pictures of a custom Cowachin sweater I made.  It was requested that the cuffs and bottom edge be hemmed, rather than working them in ribbing.  This is how I did it:


A big concern was the thickness of the yarn.  With a typical sweater, the thickness of yarn used in a Cowachin sweater would be knit on 10mm (15US) needles.  For a traditional Cowachin sweater, this same yarn is knit with 7.5-8mm (11US, and there is no equivalent for the 7.5mm is US needle sizing) needles for the main body.  So, you can see that it is worked up with a very dense fabric.  Doubling that fabric in a hem was no going to work.  This was dealt with by thinning the yarn used in the fold-up portion of the hem.  Typically, the yarn for these sweaters comes in a 5-6 ply, which has not been spun.  To thin the fold-up portion, I just peeled off 3 plies as I knit, so that I was knitting with only 2 plies (I was using Briggs and Little Country Roving, which is a 5 ply).  

Using the larger of the two recommended needle sizes in you pattern, cast on the required number of stitches using just 2 plies.  Work 5 rows of Stocking Stitch, starting and ending with knit rows.


Now, re-incorporate the missing plies to bring the thickness back up to that of the original yarn (5 or 6 plies, depending on the yarn used).  Next, knit one row on the wrong side of your work, using the full thickness of yarn.  This will create the fold line, seem in the centre of the above photo.  Continuing to work with all plies, work 6 rows of Stocking Stitch, starting with a knit row.  The fabric hanging from your needle should look like that pictured above.


The hem connecting row comes next.


Hold the bottom edge of your fabric, and look for the loops created by your cast on.  In the photo, the loops have been pulled out a bit to make them more visible.  I used a Backward Loop Cast On for this particular project, in order to get more visible, easy to find loops.  But, this technique is possible with any standard cast on.


Insert your right-hand needle into the first stitch on the left-hand needle, then the very first loop of the cast-on edge.  (NOTE: It is important to be sure you have the actual first loop, or you will run short at the end of row)  Now, knit the stitch and the loop together.  This will start to connect the fold-up portion of the hem to the body of the sweater.  Insert the right-hand needle into the next stitch in line on the left-hand needle, and pick up the next cast-on loop, knitting the two together.  Continue across the row in this manner, until hem in totally connected and the row is complete. 


This is a wrong side view of the finished hem.  The only thing left to do is to knit enough rows in Stocking Stitch to reach the same depth as the ribbing in the original pattern.  This will depend on the specific instructions in the pattern you are using.  At this point, you would just start following the charted portion of your instructions.

Knit the back, both fronts, and both sleeves in this manner.  Knit collar, as in instructions, and sew together as usual.  The end result will be a traditional Cowachin sweater, with a bomber jacket feel.


Friday 9 November 2012

Cowachin Sweater Hem: Part 1

As I posted some time ago, I was working on a daunting custom knit project of a massive Cowachin sweater.  On top of the large size and added length, the customer wanted hems, instead of ribbing, on the cuffs and bottom edge.  Here are some pics of the results.

I thought the finished look was quite impressive.  It is much more like a bomber jacket, than a traditional Cowachin-style sweater.  And, it looked really good on the customer, too.


Come back for Part 2, where I will explain how to create this finish yourself!